
Upload a clear photo, name the garment you want to change and describe its new colour or style. Ask to keep the face, pose, hands and background. Start with one item, then compare the result with your original before making another edit.
Decide What You Want to Change
Changing a colour and replacing an outfit are different jobs. Like the sweater but want it green? Ask to change only its colour. Want a blazer instead? Name the blazer, its fit and the top under it. Keep the pose and place in your first request. This makes the result easier to check.
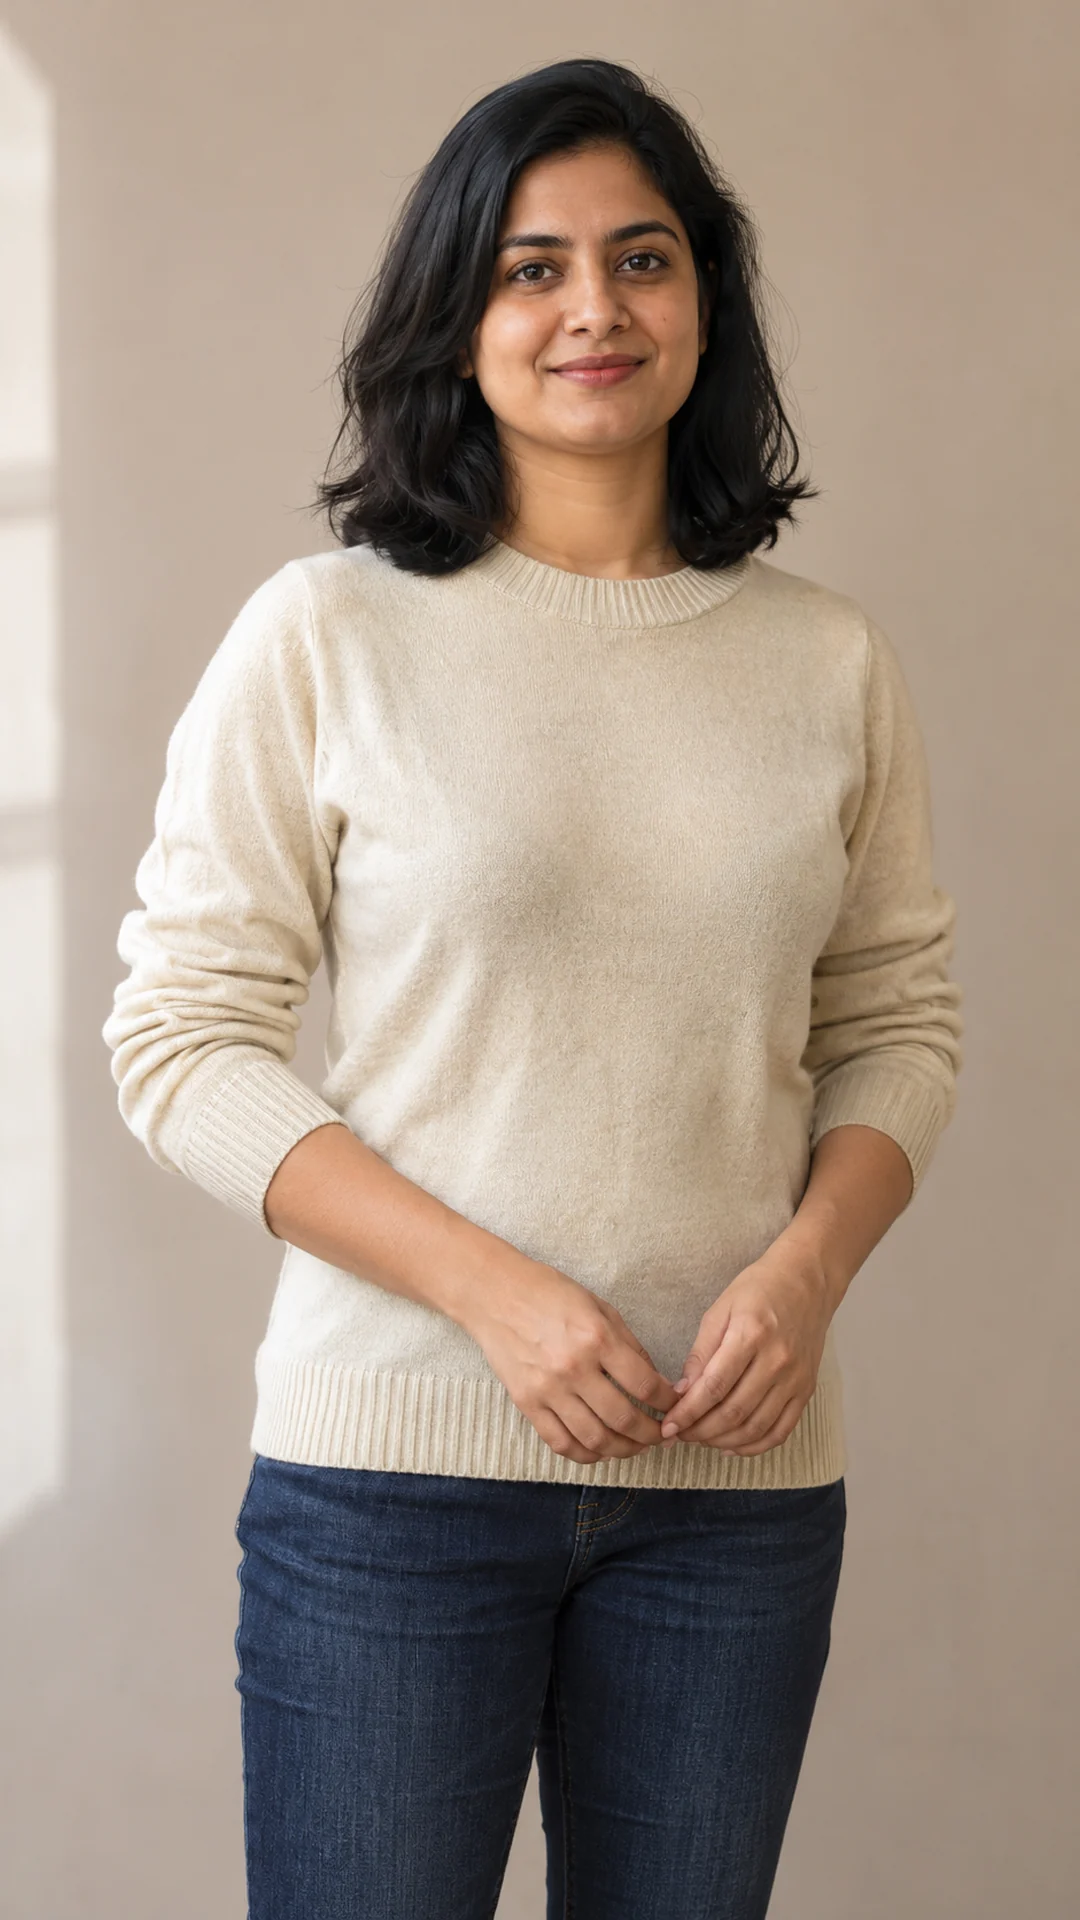
For example, “make this more stylish” leaves the choice open. “Replace only the cream sweater with a charcoal blazer over a white crewneck top” names one clear result. You can still try different styles, but save each useful version before moving on.
Choose a Reference That Shows the Garment
- Use your original photo, with the neckline, sleeves and waist visible. A head-only selfie cannot show how a full outfit should sit.
- Keep hands away from busy patterns when possible. Fingers covering buttons or cuffs make those areas harder to inspect.
- Choose an image with enough light to see folds. Strong shadows can hide where the sleeve ends and the body begins.
- Keep the unedited file. If the face or body drifts after several edits, return to it rather than editing an already damaged result.
If uploading and saving are new to you, follow our basic ChatGPT photo editing steps first. The same preparation helps with a jacket, sari, kurta or sweater.
One Reference, Two Outfit Edits
What These Examples Show
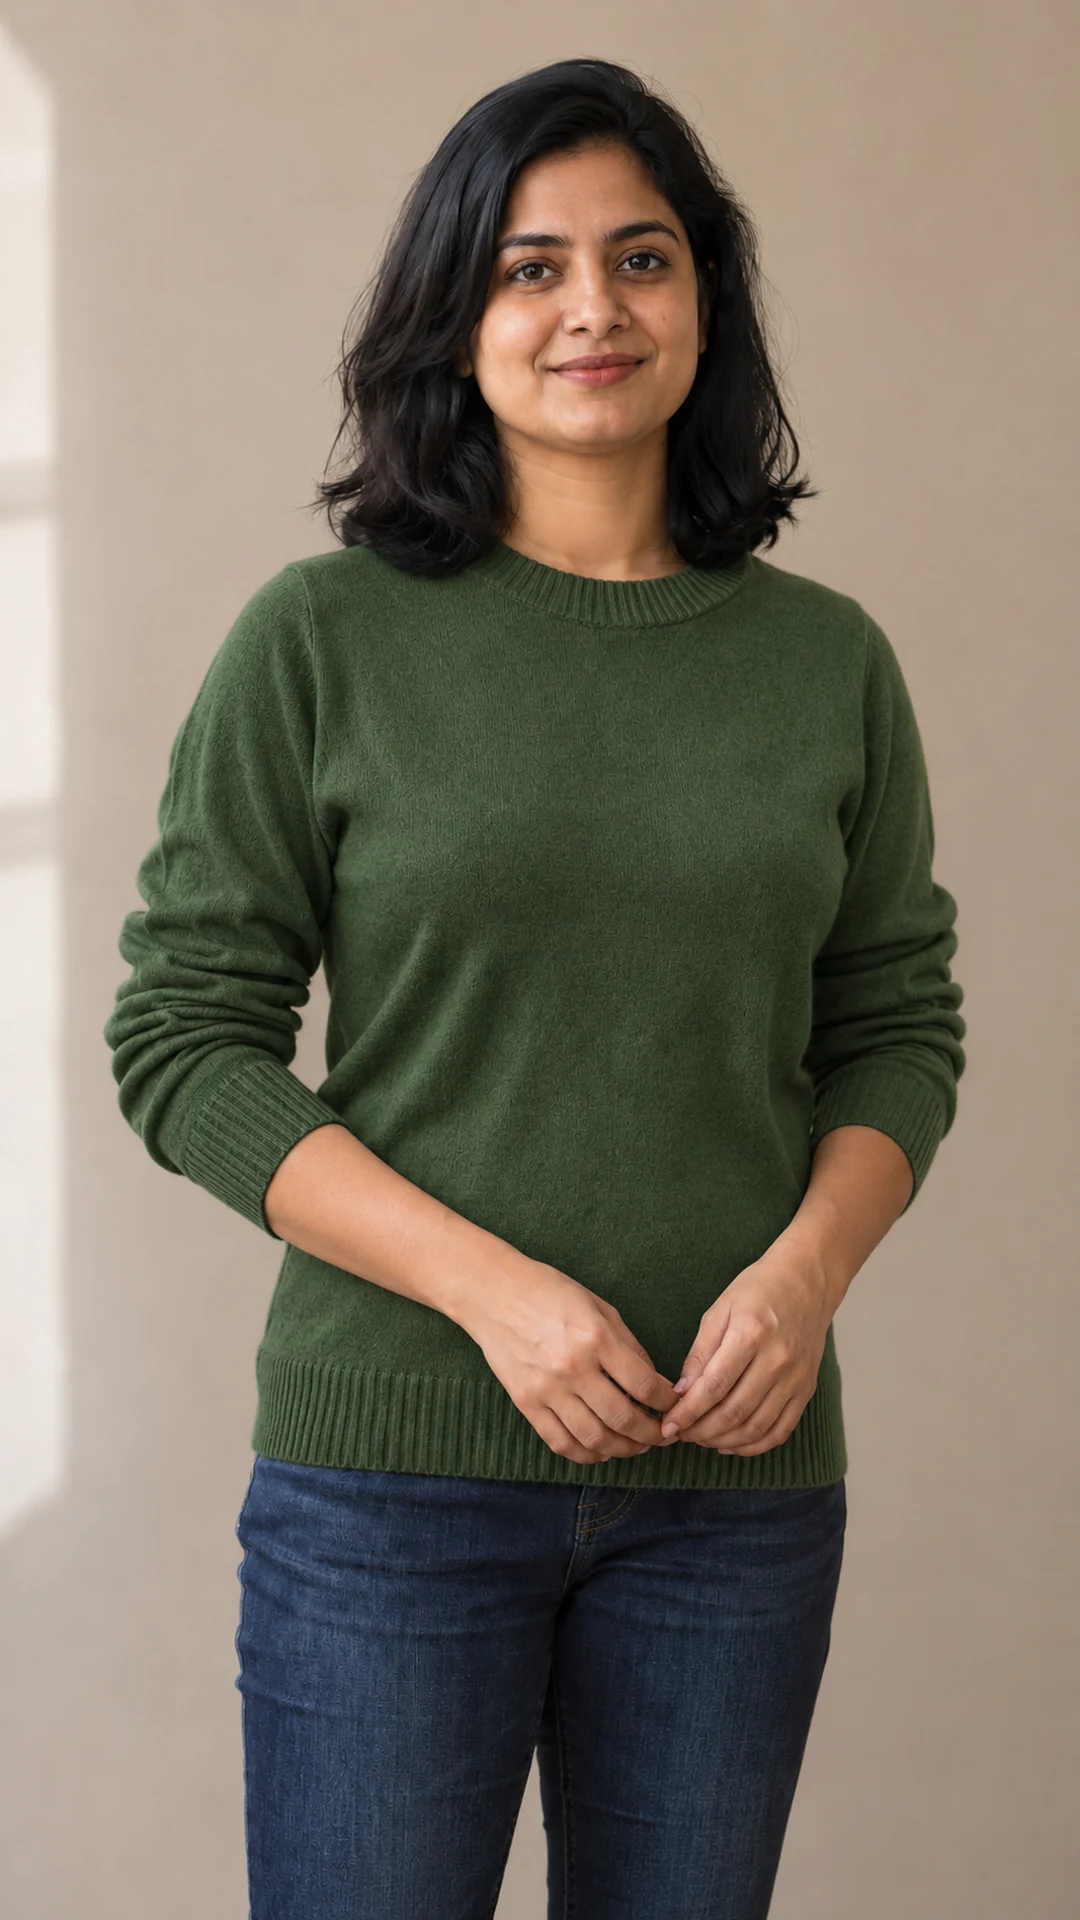
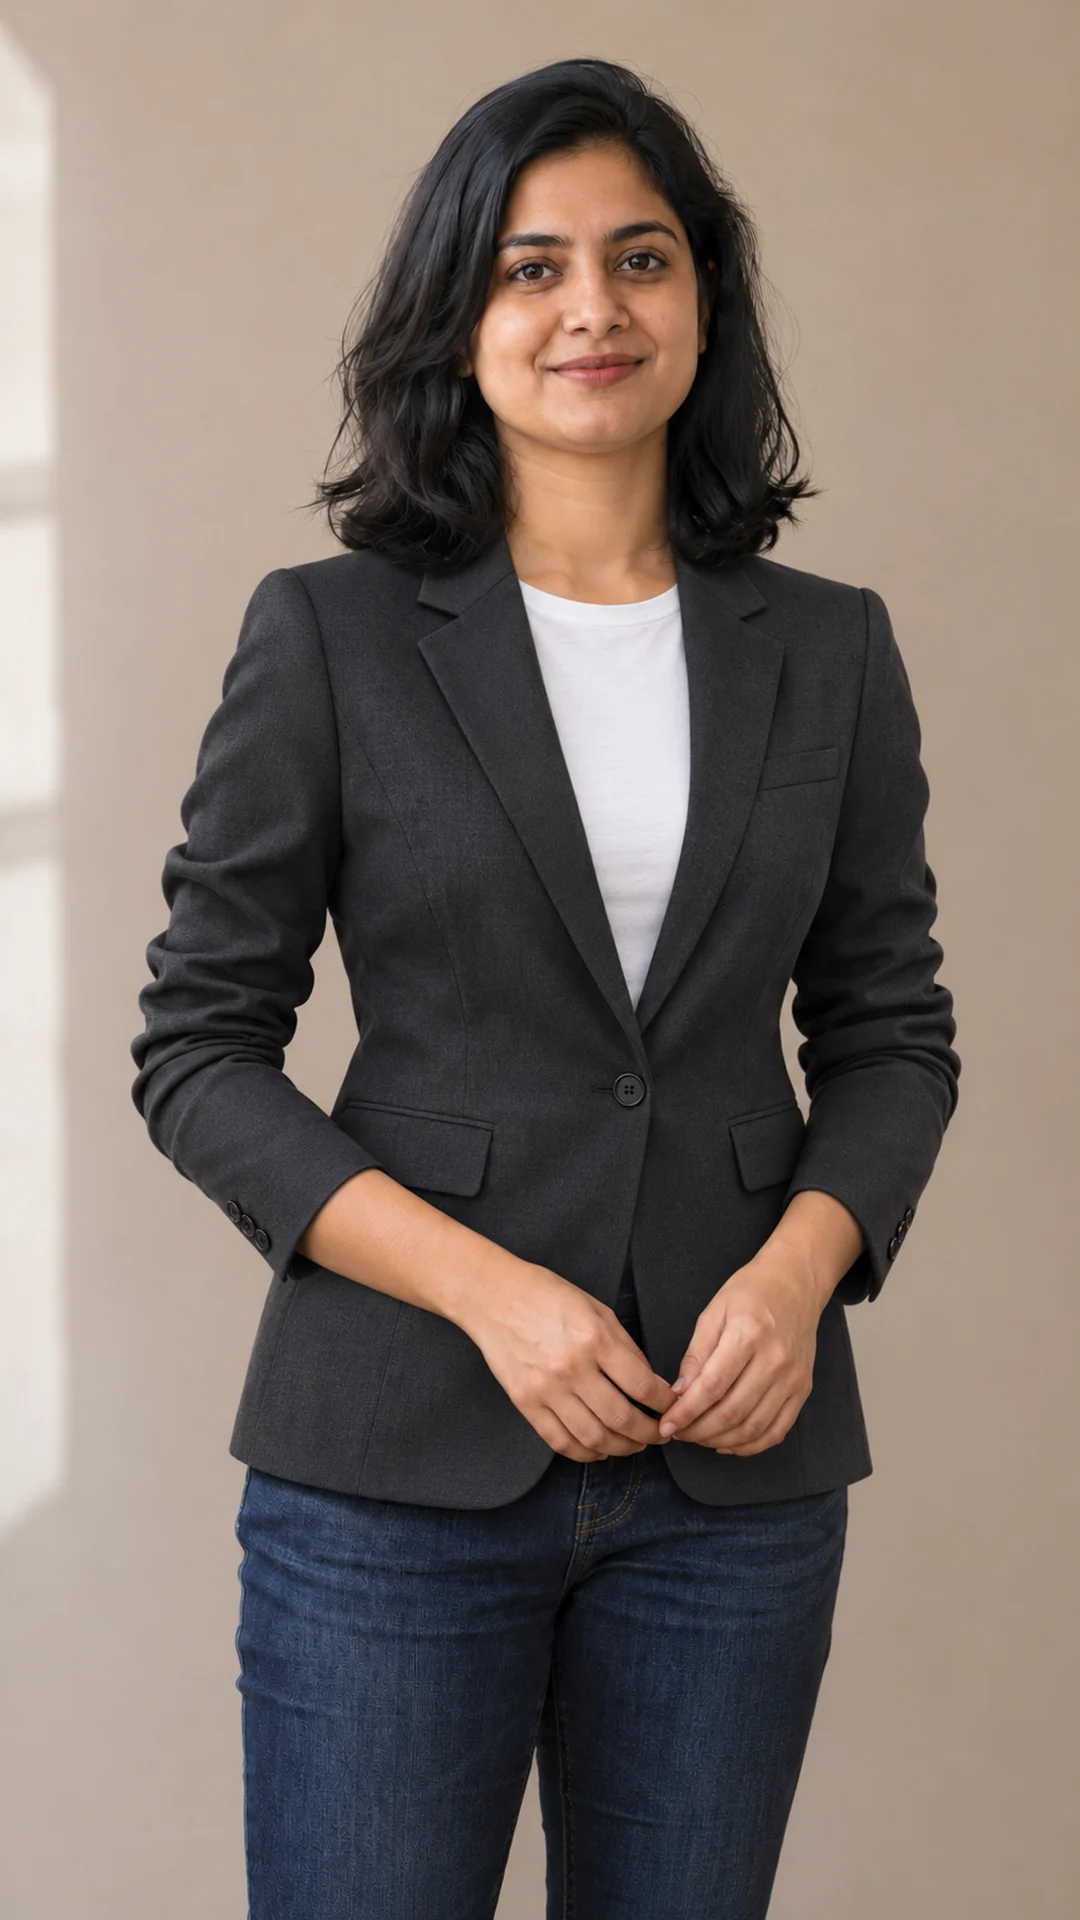
These examples show a fictional adult. We made the green sweater and blazer by editing the same starting photo. One changes the colour; the other changes the item of clothing. Compare the face, cuffs and hands in all three. Small details may still change. These pictures do not show how a real item will fit you.
Choose the Smallest Useful Edit
| Goal | Ask for | Inspect |
|---|---|---|
| New colour | Recolour one named item | Original knit, seams and shadows |
| New garment | Name garment, fit and layer | Collar, cuffs, hands and waist |
| Use a clothing reference | Describe the reference role | Pattern, coverage and proportions |
Edit the Outfit in ChatGPT or Gemini
- Open an image-capable chat and upload your photo. Availability and controls can differ by account and app.
- Name this upload as the person reference. If you add a garment photo, say it is clothing guidance, not a replacement person.
- Paste one prompt below. Replace the colour or garment words before sending it. Keep the preservation instructions.
- In ChatGPT, a selection can help point to the garment where that control is available. Describe the garment in words too; a selection does not perfectly fence in an edit.
- Compare at full size. Check the face first, then the hands, garment edges and original crop. Ask for one correction if needed.
- Save the accepted result as a new file. Keep the original and the prompt so you can make a clean alternative later.
For uploading a clothing reference and asking for an edit, see Google’s steps for editing an uploaded image in Gemini.
Prompt 1: Change Only the Sweater Colour
Edit the uploaded photo. Change only the cream sweater to a muted forest green. Keep the original knit pattern, neckline, cuffs, folds and shadows. Keep the face, skin tone, hairstyle, expression, body proportions, hands, pose, jeans, background and framing unchanged. Do not smooth the skin or add text, logos, accessories or people.
Check a Colour Edit Before Replacing the Outfit
A colour edit is a useful first check because the shape should not need to change. Look at the shoulder seams and the ribbing near the wrist. If these are redrawn, ask to retain the original garment structure. Do not keep requesting “more realistic” without naming the changed detail. For outfit ideas after this check, see our winter sweater prompt examples.
Prompt 2: Replace a Sweater With a Blazer
Edit this photo. Replace only the sweater with a charcoal tailored blazer over a plain white crewneck top. Use a relaxed natural fit, realistic lapels, seams and fabric folds. Keep the original face, skin tone, hair, body shape, hand placement, jeans, background, lighting and crop. Do not reshape the waist or lengthen the arms. No text, logos or extra accessories.
Prompt 3: Try a Simple Traditional Suit
Edit the uploaded photo. Replace the visible outfit with a plain deep teal cotton kurta and a cream dupatta resting naturally over the shoulders. Keep the existing body proportions, pose, face, skin tone, hair, hands, background, lighting and crop. Use modest coverage and believable cotton folds. Do not invent parts of the body outside the original frame. No text, logos or added jewellery.
Fix Buttons, Sleeves and Fabric Edges
If buttons turn into dots or merge with a seam, simplify the garment. Ask for a plain front or fewer visible buttons. For a sleeve that crosses the hand, name the exact boundary: “End the cuff at the wrist and keep all visible fingers separate.” If the hand itself has changed, return to the source photo and repeat the outfit request with the hands protected.
A reference garment can guide colour, pattern and coverage, but it cannot show how that item will fit your body in real life. Screens and lighting also affect colour. Do not use a generated image as proof of a product’s true shade, material or size. For shopping decisions, check real measurements and the seller’s photographs.
When marking a sleeve or cuff, remember that ChatGPT can change areas outside the selection. OpenAI explains this in its guide to selecting an area for an image edit.
Final Outfit Check
- Face and hair still match the source; body shape has not been changed.
- The neckline, lapels, cuffs and hem have clear, connected edges.
- Fabric passes behind hair and hands in a believable way.
- Highlights and folds follow the light already in the scene.
- The saved file has the crop you wanted and no unwanted lettering.
Keep the Edit Clear and Useful
A useful outfit edit starts with one clear request and ends with a careful comparison. Keep the original, name the garment and check details before sharing. When the outfit works, browse more photo prompt collections for a scene that suits it rather than changing everything in the same request.
AI Clothes Editing Questions
Can I change just one item of clothing?
Yes, ask for the item by name and list what must stay. Inspect nearby hands, hair and accessories because the edit may change them too.
Do I need a full-length photo?
Only if the result needs a full outfit. A waist-up photo is enough for a visible sweater or blazer. It is a poor reference for trousers or shoes that are outside the frame.
Will the edited outfit show the real fit?
No. It is a generated preview, not a size or fit measurement. Use real garment measurements for buying clothes.
Can the face stay exactly the same?
Ask to keep the face, but check the result yourself. AI can still change small details. Compare with the original and reject a version that no longer looks like you.