Upload your original photo, describe one change and check the result before adding another change. This guide gives you a simple workflow and three prompts that work for everyday photo edits.
What ChatGPT Can Edit
ChatGPT can edit an uploaded image when you describe the change you want. You can ask for a new background, a different outfit, a cleaner object-free scene or a new crop. For one small area, use the selection tool and name that area in your message.
Start with one useful change. A request with a new face, new pose, new outfit, new place and new lighting all at once gives the editor too many choices. Small edits are easier to check and repair.
How to Edit a Photo in ChatGPT
- Open a new ChatGPT chat and upload the clearest original photo you have. A bright photo where the face is visible gives the editor more to work with.
- Write the one change you need first. For example: “replace the wall behind me with a plain cream studio background.”
- Add what must stay the same: face, skin tone, hairstyle, pose, clothes or framing. Only include items that matter to the edit.
- For a local repair, open the image, use Select to mark the area, then describe that area in words as well.
- Look at the result at full size. Check the face, hands, hairline, text and the edges where the new background meets the person.
- If one detail is wrong, reply with one direct correction. If several details have drifted, upload the original again and start from it.
Prompt 1: Change Only the Background
Use this when the person and pose are already right. It changes the setting while keeping the rest simple.
Copy the Background Prompt
Edit the uploaded photo. Change only the background to a clean, softly lit cream studio wall. Keep the same adult person, facial features, skin tone, hairstyle, expression, pose, clothing, camera angle and crop. Keep natural skin texture and match the new background light to the face. Do not add text, logos, props or extra people. Return a realistic photo in the original aspect ratio.
Prompt 2: Change an Outfit
Do not ask for a full makeover when you only need new clothes. This prompt tells ChatGPT where the edit should stop.
Copy the Outfit Prompt
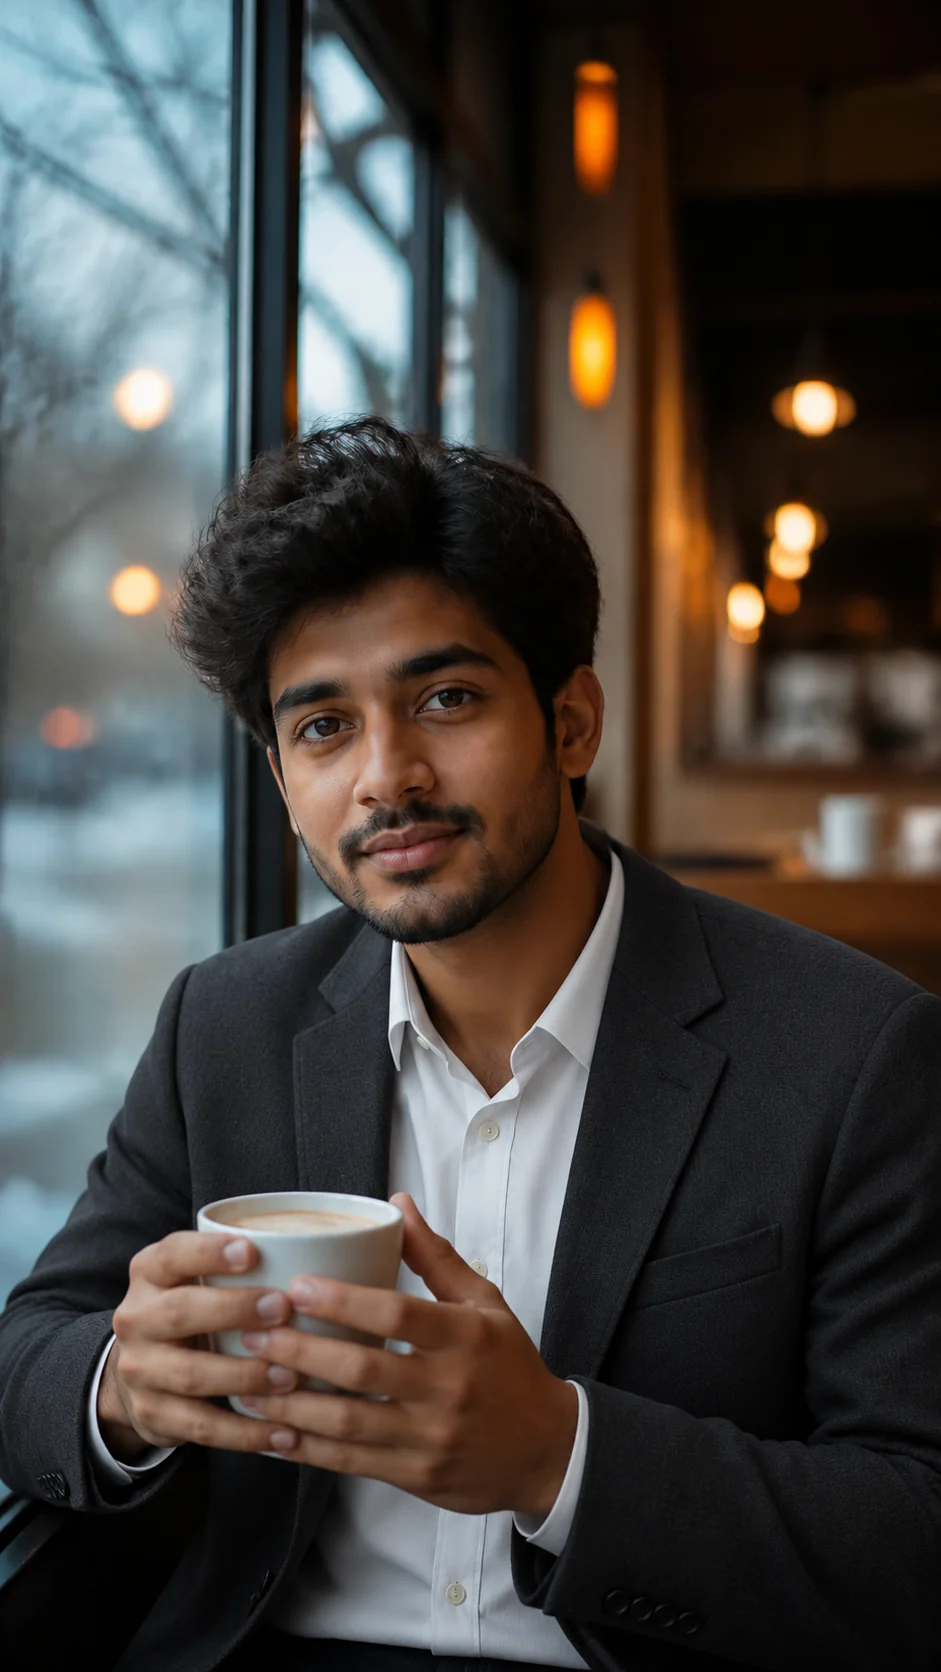
Edit the uploaded photo. Change only the clothing to a neat charcoal blazer over a plain white shirt. Keep the same adult person, face, skin tone, hairstyle, expression, body shape, pose, hands, background, lighting and framing. Make the blazer fabric and shadows look natural. Do not change the person’s identity or add accessories, text or logos. Keep the original aspect ratio.
Prompt 3: Remove One Object
Use a short, named request for one unwanted item. If the object is near the face or hand, use Select first and keep the request narrow.
Copy the Object Removal Prompt
Edit the uploaded photo. Remove only the [object] from the [left, right or background] area. Rebuild the hidden background naturally. Keep the person, face, hands, clothing, pose, lighting, camera angle and all other objects unchanged. Do not crop the image or add text, logos or new people. Return a realistic photo in the original aspect ratio.
Fix Common ChatGPT Photo Editing Problems
| Problem | What to write next | What to check |
|---|---|---|
| Face looks different | Use the original photo again. Ask to keep the original face, skin tone, hairline and expression. | Eyes, jawline and hairline. |
| New background looks pasted on | Ask for one soft light direction that matches the face. | Shadows on the neck and shoulders. |
| Hands look strange | Ask for relaxed hands outside the main focus, or keep the original hands unchanged. | Finger count and joins. |
| Outfit changes the body shape | Ask to keep the original body shape, pose and framing. | Shoulders, arms and clothing edges. |
| Text or signs are wrong | Remove the sign in the edit, then add real text later in a design tool. | Small writing and logos. |
| Too many things changed | Start a new chat with the original photo and request only one change. | Whether the result matches the original. |
Use a Better Starting Photo
- Use the original image file instead of a screenshot when you can.
- Choose a photo with a visible face and even light.
- For an outfit or full-body change, use a photo that shows enough of the body.
- For two people, make sure both faces are visible before editing.
- Keep a copy of the original. Repeated edits can move away from it.
When to Use Select
Use Select when you need to change a small part, such as an object on a table or a mark on a wall. The selection can be approximate, so state the area in your prompt too. For a full background or outfit edit, a normal chat instruction is often enough.
What to Do After the Edit
Save the best version before you try another idea. Put the result beside the original and check the important details. If you are posting a new style photo, use a ready-made collection such as our ChatGPT photo prompts or Gemini AI photo prompts. For face matching, read our guide on keeping your face recognisable in AI edits.
Read the Examples Before You Edit
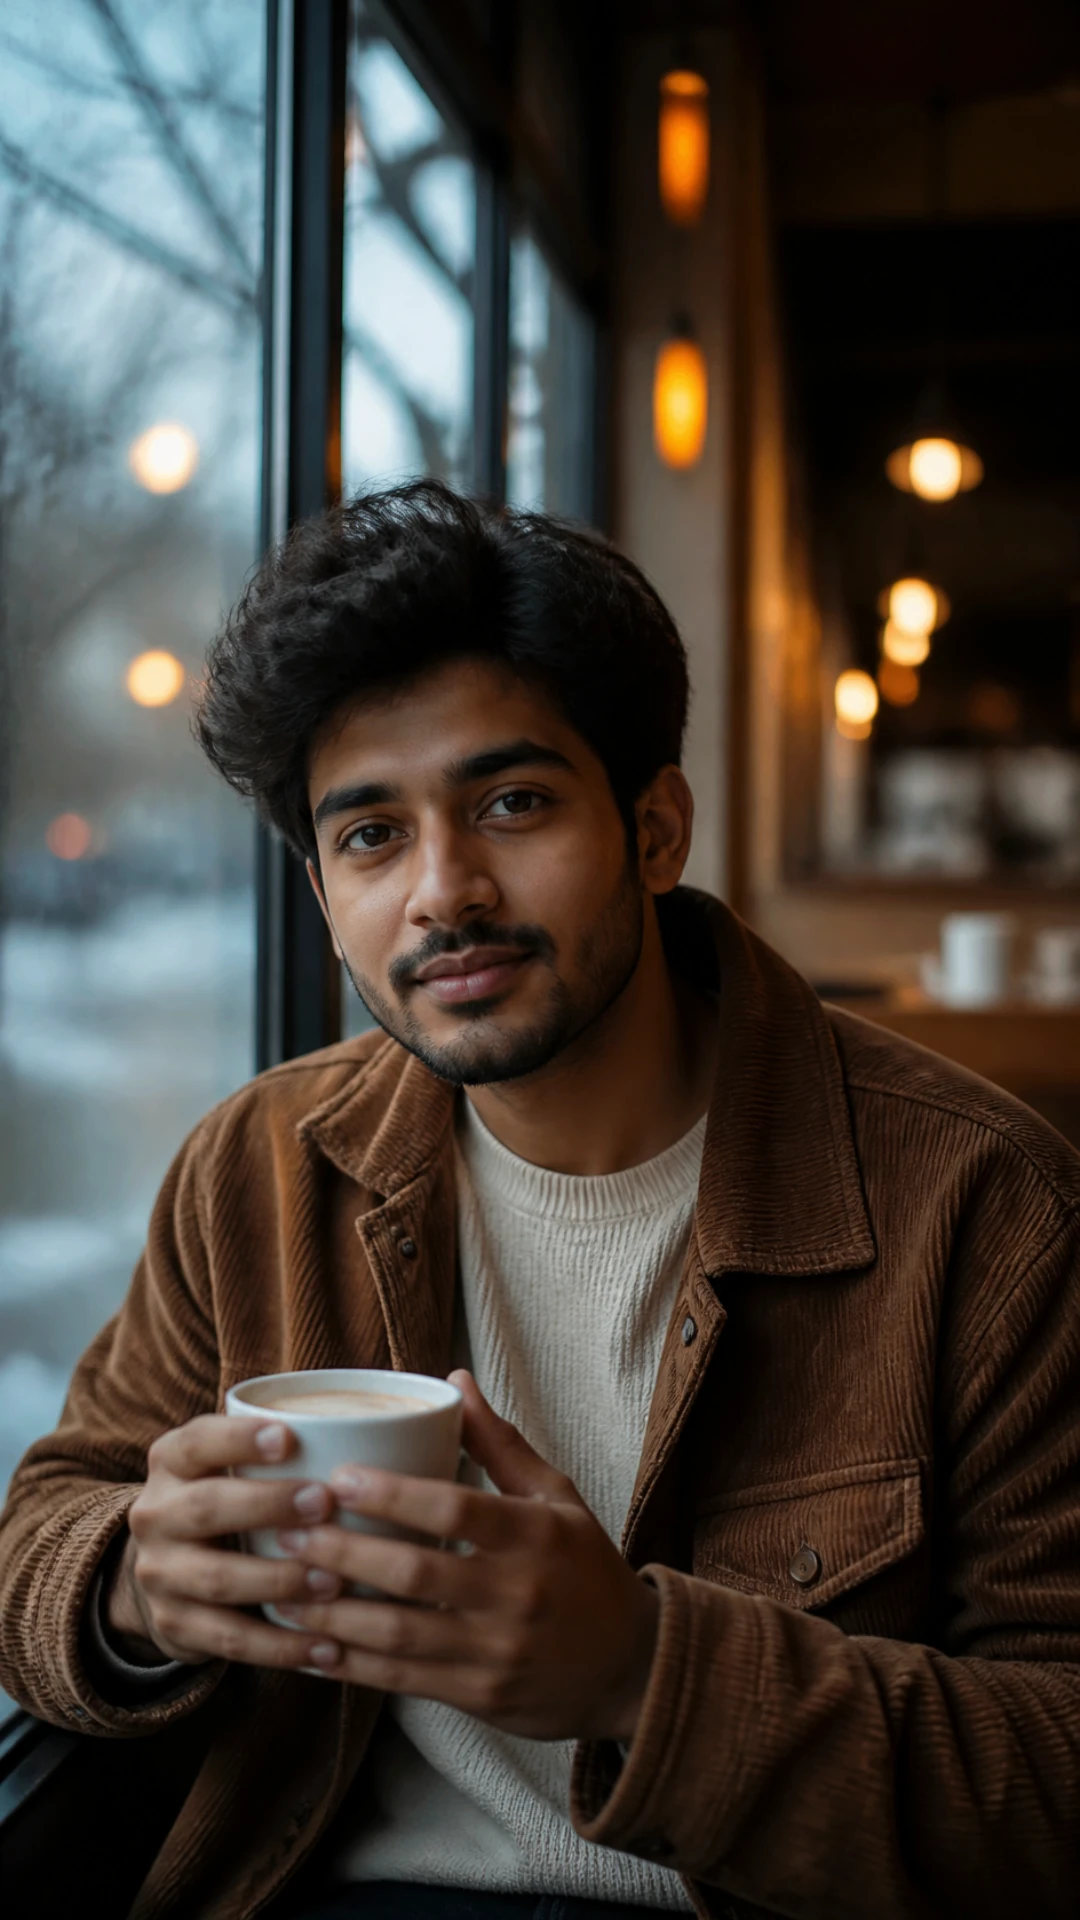
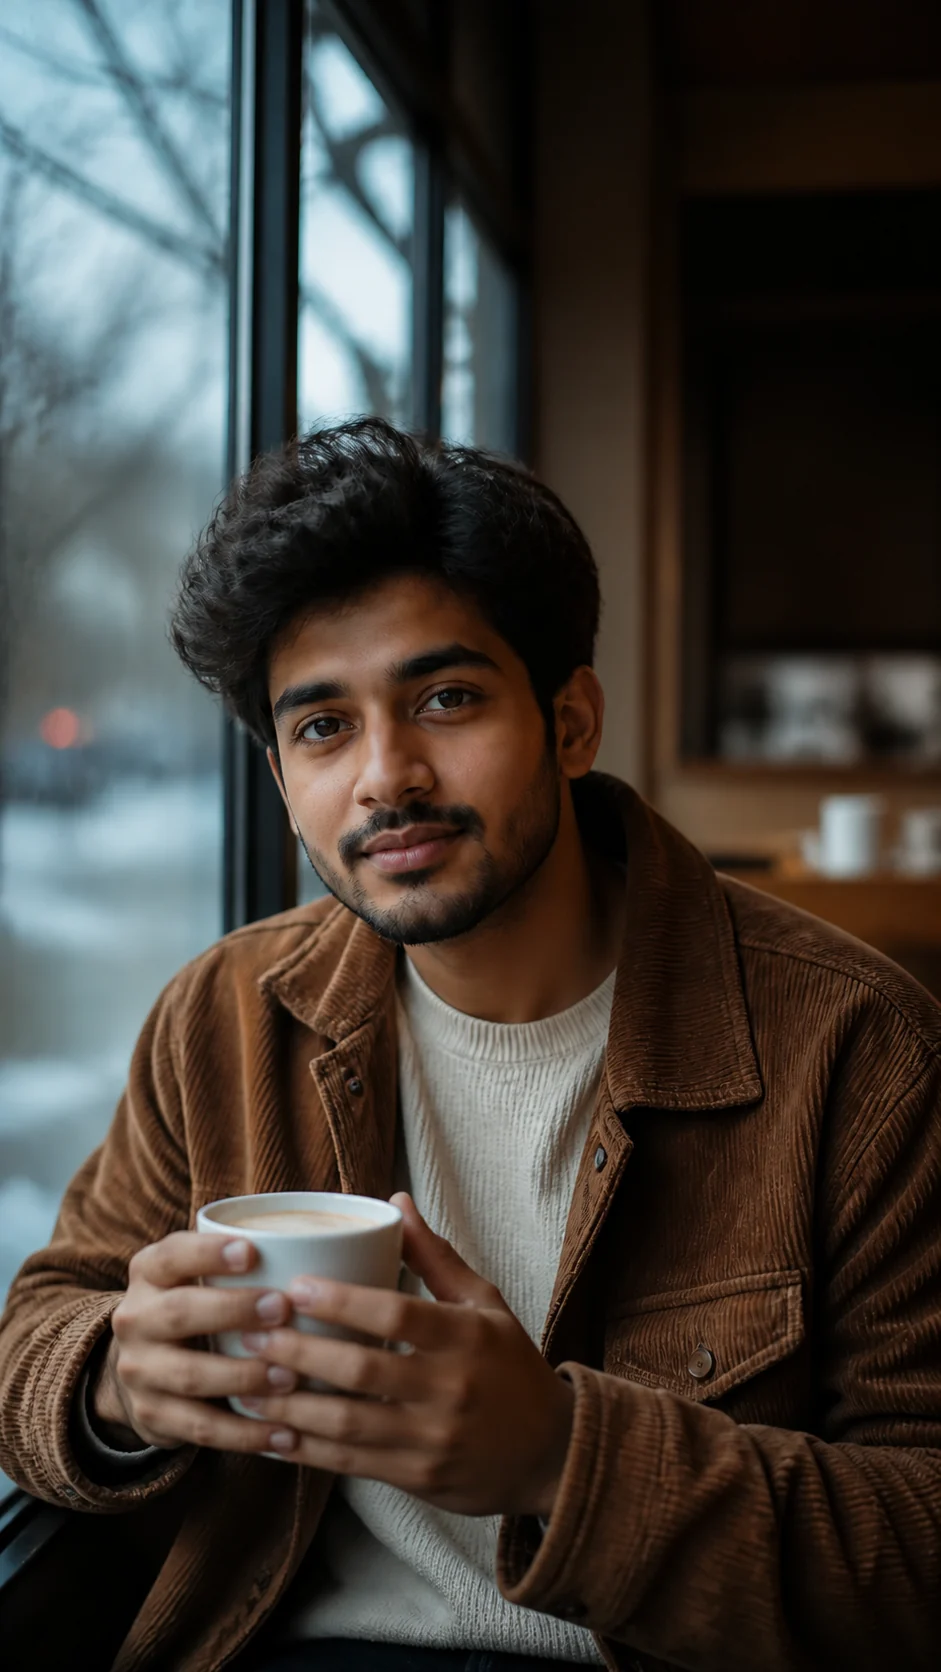
These fictional-adult examples show an original reference and two edits made from it with ChatGPT image generation. Each caption identifies the requested change. They are examples of what to inspect, not a promise of exact identity or pixel preservation. Small details can still drift, so compare every result with its own original.
The clothing example and lamp-removal example are separate edits from the original brown-jacket portrait. Compare each with the original, rather than comparing the two edited versions to each other. This lets you spot an accidental clothing, face or lighting change.
Three Visual References and What to Inspect
Walk Through One Edit From Start to Finish
- Start with the original reference in the first image. Note the clothing, hand position and direction of light. For your own edit, make this note from your own uploaded photo.
- Choose one job: change the room, replace the clothing or remove a named object. Use the matching prompt on this page. Replace bracketed placeholders before sending; leaving “[object]” in a request makes your goal unclear.
- Compare the original and result at a similar zoom. First check the requested area. Then check the face, cup, fingers, sleeve edges and crop. Do not approve the whole image just because the new room looks good.
- If one edge is wrong, request one edge repair. If the face, pose and props all changed, return to the original upload with a shorter request. Save the good version before trying a different style.
Make a Useful Follow-Up Request
Avoid “make it better” when you can name the problem. A useful follow-up is: “Keep this version, but remove the bright fringe around the left shoulder. Keep the face, hair, clothing and framing unchanged.” The location and the fault tell the editor what you are trying to repair. Treat a selection as guidance, not a guarantee that nearby pixels will stay fixed.
Check whether a repair changes something that was already correct. A smoother outline is not an improvement if it removes an earring or changes the jaw. Stop repeating the same broad request when each version loses another detail. For precise boundaries, keeping the original subject in a layer-based photo editor may be a better finishing step.
Where to Go Next
If the setting is your main task, use our detailed background replacement guide. If the scene is fine but the face changes, follow the face-preservation checks. These guides address different faults, so choose the one that matches what you can see.
ChatGPT Photo Editing Questions
Can I edit a photo I already have in ChatGPT?
Yes. Upload the image in a chat and describe the change. For a small area, open the editor, select that area and name it in your instruction.
How do I stop ChatGPT from changing my face?
Use a clear original photo and say which features must stay the same. Make one change at a time and compare the result with the original. Exact identity matching cannot be guaranteed.
Why should I use one change at a time?
A smaller request is easier to inspect. If the result goes wrong, you know which change caused the issue and can return to the original photo.
Can I remove text from a photo?
You can ask to remove unwanted text. If you need accurate new wording, add it later with a normal design tool because AI-generated text can be inaccurate.